One of the most common questions I get from my clients is, “How do I create an email signature like yours?” I’m not going to lie – I LOVE it when this question lands in my inbox because it shows me how much they care about their brand and making a great impression with attention to the details. A professional email signature design is a simple way to quickly polish and uplevel your brand!
The importance of the little things in your client experience
Often, we are so busy focusing on the obvious parts of our client experience like our website, social media profiles, or printed materials, that we tend to overlook the one we use the most – our email correspondence.
And a great first impression matters! A prospective client may have emailed you an inquiry and also reached out to your competition. Small touchpoints like an email signature can set you apart while also revealing your flair.
A professional email signature design can play a big part in bringing your personality into people’s inboxes and sharing thoughtful and strategic information. You’d be surprised how your email signature can subtly invite potential clients to explore your website or social outlets, connecting them even more with your business and services.
Two ways to create your professional email signature design
Since I am all about streamlining and making things so much easier for myself and anyone I meet, I will show you two ways to create a professional email signature design with HoneyBook!
HoneyBook (my favorite business tool EVER) has made creating an email signature design quick and easy. The first way I will show you how to create an email signature is if you have a HoneyBook account and use it for your client correspondence. Then, I will also show you how to use the FREE HoneyBook email signature generator to keep your brand experience consistent and apply it to your Gmail account.
What to include in your email signature
Before we get into the step-by-step tutorials, let’s talk about what you should have in your email signature.
Here is a list of some ideas you could include in your email signature.
- Logo, Brand Icon, or Headshot
- Name and Title
- Business Name
- Website
- Phone Number
- Tagline
- Office Hours
- Advanced Out of Office Dates
- Upcoming Travel Locations
- Social Media Links or Handles
- Recognitions / Awards
- Custom Handwritten Signature
- Quote
Now, I wouldn’t advise including all of these items because that would feel overwhelming to your email recipient and look clunky, which would do the opposite of our intention with your email signature. Give thought to your brand specifically, your work, and what pieces of information will pull draw someone towards you.
I’ll share some best practices for different signature components to help you decide the information you should apply. This list should help bring clarity!
Best practices for creating your email signature
- A headshot – A headshot is a definite “yes” If you are building a personal brand and you are the face of your business. Make a memorable first impression by including your headshot in your email signature. According to Forbes, “People have an inherent trust of other people. Including a face along with your message instantly humanizes it and makes it more trustworthy.” Trust is a good thing, right?
- Your business name and title – We all should know to include our business name and contact info in our email signature, but don’t forget about your job title. Stating your role lets people know exactly what you do.
- Call to action (CTA) – Your email signature is a great place to further connect with your inquiries and clients. You can change this area from time to time for whatever you’d like to promote. Are you hosting an event? Is there a promotion you are running? Do you want to invite people to join your email list, follow you on social media, or even explore your signature service or portfolio? Just keep this in mind- only include ONE call to action. When people are given too many choices, they won’t take action. However, give them one path forward, and they’ll land where you want them.
- Sign off with a Thanks! – In a world where everyone seems to be in a hurry, be gracious and offer a simple thank you! It has been found that emails ending with a form of “thanks,” “thanks in advance,” or “thank you” have a higher response average than emails that closed with other sayings. Saying “thanks” show people that you appreciate their time to correspond with you. Plus, being nice always gets you farther, right? You’ll catch more flies with honey (or whatever that saying is!). Friendly is attractive!
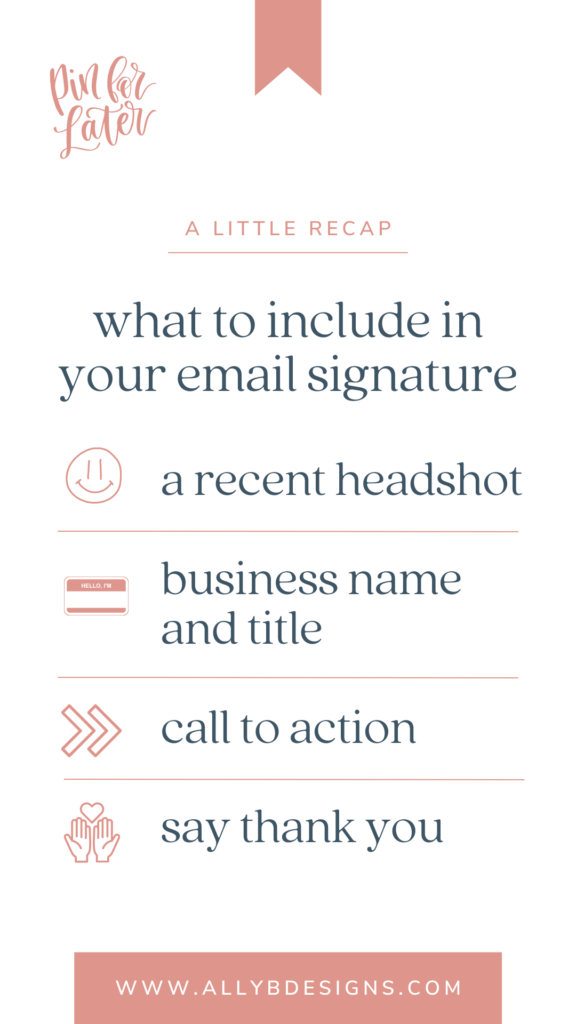
Throw a little confetti or clink some glasses because now you’re clear on WHAT belongs in your professional email signature design.
Next, I’m going to show the HOW. I’ll give you step-by-step guidance on two ways to create your email signature.
First up, we will create your professional email signature design within your HoneyBook account.
Step One: Head to the templates section in your account and select the email signature template.

Step 2: Customize your design.
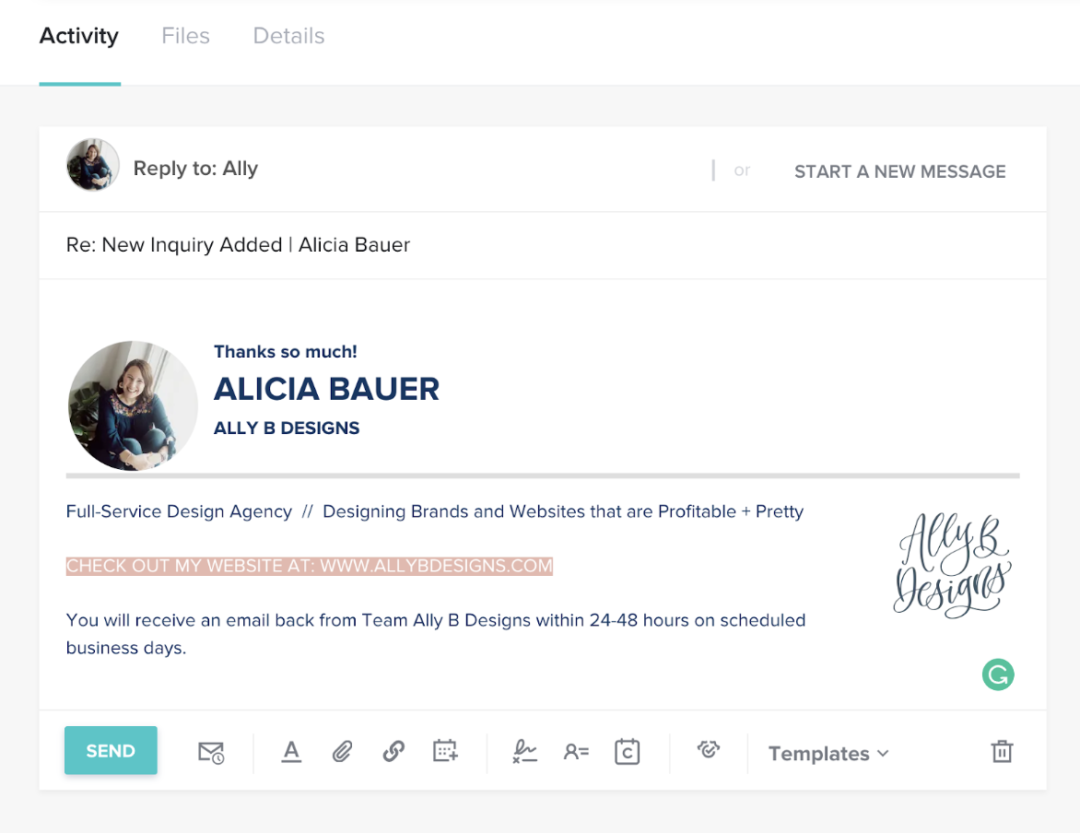
Now it’s time to design your email signature. Your HoneyBook account does not have any pre-designed templates to select from, so my best advice is to keep your design simple. Take a peek at this quick video, where I’ll show you exactly how I set up my HoneyBook email signature.
That’s it! Once you have customized your email signature template, it will be included in your HoneyBook account email correspondence.
Remember I said you have two options? You can also create an email signature using the FREE HoneyBook Email Signature Generator.
HoneyBook’s email signature generator is perfect for just about any kind of business, and it’s so quick and easy.
All you have to do is input your important details; the generator does the rest for you – it places everything in a unique and professional design that looks great.
Step One: Select an email template.
Choose an email signature template that works best with your branding. Pick one you love but also consider font styles that align with your current brand, how you want your headshot/logo to be presented, and the call to action you want to include as your focus. To select your template, simply hover over it and click “Use this template.”

Step Two: Enter your business details.
A preview of the template you’ve selected will now appear on the top right of the page. Fill in your details on the top left side of the page. This will automatically update on the right where you can see exactly what it will look like. Next, pop in your headshot or logo and include the social media links you are actually active on. If someone clicks the social icon, they want to dive in deeper with you, and you’ll want to show them an active social presence.
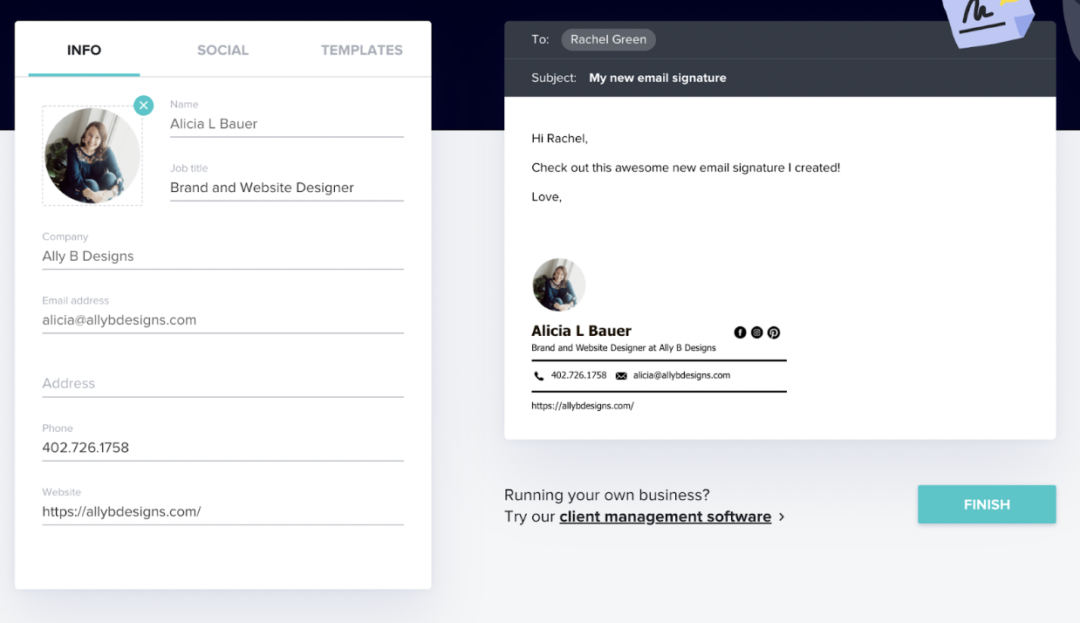
Step Three: Save your design.
This is it! Once you’re happy with how your email signature looks, just click the Finish button, confirm your email address, then check your email for your new email signature.
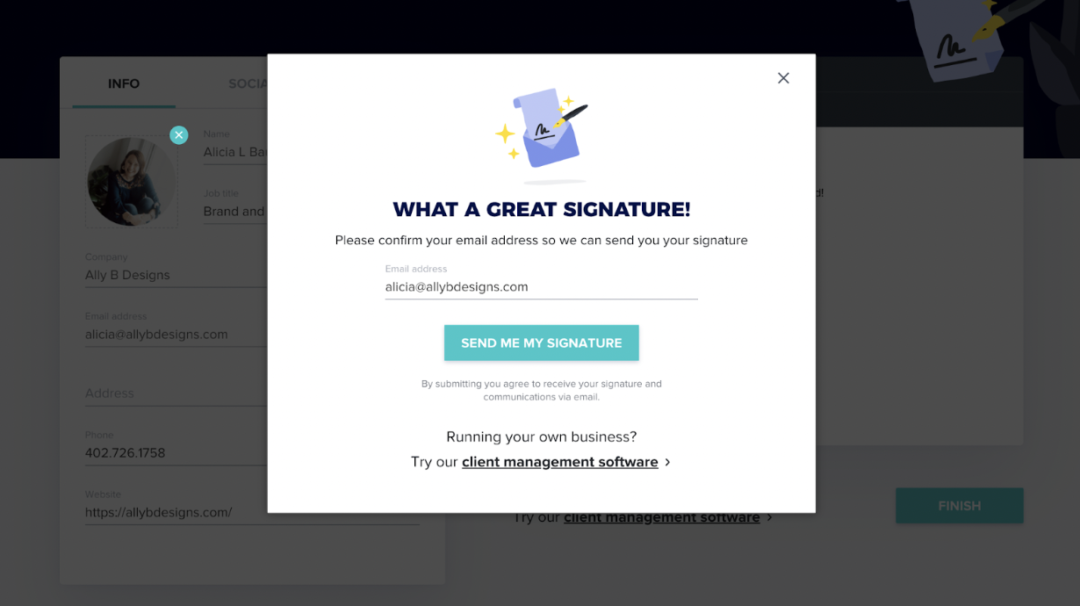
Step Four: Include your email signature in all your emails.
Whew! Now the hard part is done, you are ready to share your professional email signature design in every message you send! To update it in Gmail, go to your inbox, click on the gear icon in the upper right corner, and click Settings.
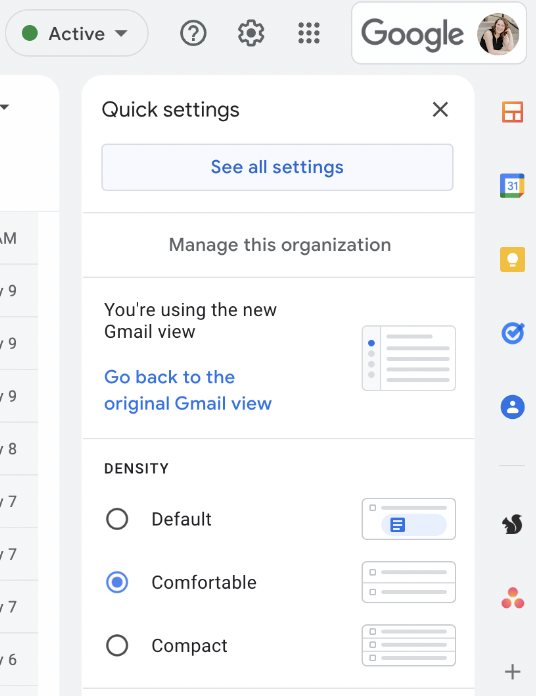
Under General, scroll down to the Signature section and paste the email signature that HoneyBook sent to you. This step is where editing your signature is easy. Just in case you missed including a CTA or anything else in the generator, you can edit/add that information. Don’t forget to hit Save Changes at the bottom of the page. The steps will be similar if you use an email account other than Gmail.
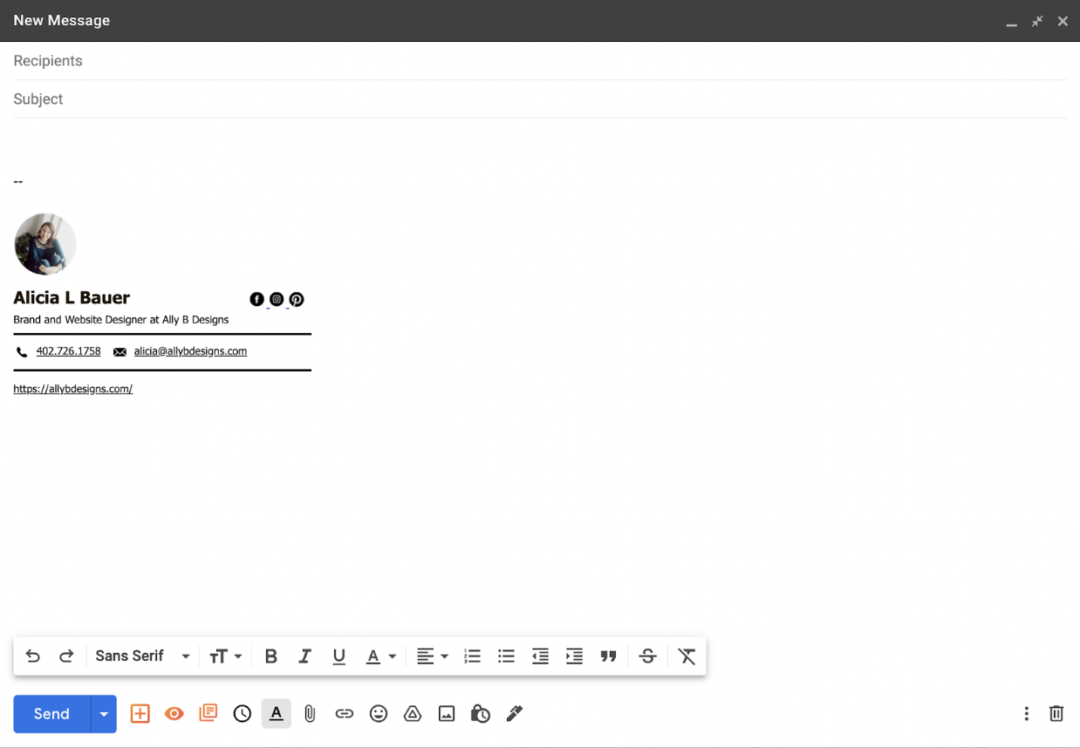
There you have it! You did it! Your professional email signature design is in place, elevating your brand from the very first email communication.
An email signature improves your client communications by making your messages more memorable and actionable.
Now that you have made it to the bottom of this post, are you ready to upgrade your email signature? It’s so simple to design this one little brand asset that represents your brand as well as you do. The HoneyBook email signature generator is entirely free and allows you to include design elements in all your emails in just seven easy steps—no coding or Illustrator skills needed.
If this got you excited, you’ll definitely want to read what’s next!
You’ve made your email signature and elevated your brand’s attraction, but you want to take your client experience to the next level. I hear you, and I highly recommend signing up for a HoneyBook account.
I could go on and on about all the reasons I love HoneyBook. It creates efficiency, which drives my profits with the time I recover, and it makes my brand look put together. In fact, I love it so much that I became a HoneyBook Educator AND a HoneyBook Pro.
I will sing their praises until the end of time, and I am the first to raise my hand to be a beta tester anytime, and they are constantly working on new developments! That’s the sign of a great business tool- one that is continually evolving to fit your needs.
Would you like to give it a whirl and wow your audience?
I promise you’ll love HoneyBook, and I know you’ll love it more with the special trial offer I can give you. Here’s a trial for not 20%, not 30%, not 40% but 50% off your HoneyBook experience! Use code: ALLYBDESIGNS at checkout!
If you want to reach out and connect before jumping into Honeybook, fill out our contact form or check out my Honeybook services and I can answer any questions you might have!
