


You are busy being a mom, running a business, and constantly trying to be the best version of yourself.
I get it! I often find myself searching for and trying out new apps to simplify my life and work. But I often end up spinning my wheels and wasting time getting everything set up to find out it is WAY overcomplicated and what I need is a much more simple system.
I have fallen into the trap so many times from social media posting apps, project management tools, and, oh my, don’t get me started on how I struggled for years with finding the system to keep all of my client information and important docs in line. That is until I found Honeybook!
What is Honeybook?
HoneyBook is a client relationship management (CRM) system where you can communicate with your clients, manage client projects, send and e-sign agreements, accept payments, and so much more!
As a brand designer, I am constantly talking about how important creating a consistent and cohesive brand experience is and it has never been easier!
When you want to charge premium prices you have to present yourself in an elevated way. You can’t show up online as the hot mess express and expect people to hand over their dolla dolla bills! It’s just not going to happen.
This isn’t important to only brand designers. Having a consistent and cohesive brand provides an elevated experience and can change the perception of what you are worth instantly!
With Honeybook, you have total control over your brand appearance and can ensure that every touchpoint your client comes in contact with is cohesive with your brand.
You can easily preview all resources and communication before sending anything to your clients so you know exactly how it will look and what you need to adjust to make it as user-friendly as possible.
Honeybook is My Brand’s Secret Weapon.
Out of all of the tools and systems, I have tried, I love Honeybook the most. While it allows me to customize the designs for my brand, it didn’t have so many possibilities and options where I wasted my time trying to customize every ounce of the journey.
I love that I can…
– Tweak the color palette
– Customize the header image
– Upload any necessary logos
– Customize the design (so everything client-facing is cohesive and not a hodge-podge mess!)

When you have a mess of unmatching elements in your booking process, a potential client might not see a high-value ticket item. When your booking process and client experience are beautifully branded and easy to use and follow – the value of what you have to offer will be elevated and people won’t bat an eye at the price because they can visually see the value.
I think I spent more time making things “pretty” in Dubsado than I ever did actually sending files to my clients. Heck, I might have spent more time making things pretty in Dubsado than I actually did client work – back then.
I quickly, easily, and painlessly got started in Honeybook and I have never looked back!
While there are some technical things you need to do to get Honeybook set up and running, like connect your email and your bank account, it’s easy to set up Honeybook to easily support your business if you know where to start. I am going to share with you my top 5 tips on getting your brand set up and started in Honeybook.
Step 1. Add in Your Visual Branding
First things first, it’s time to make your brand shine! You are going to customize your settings.
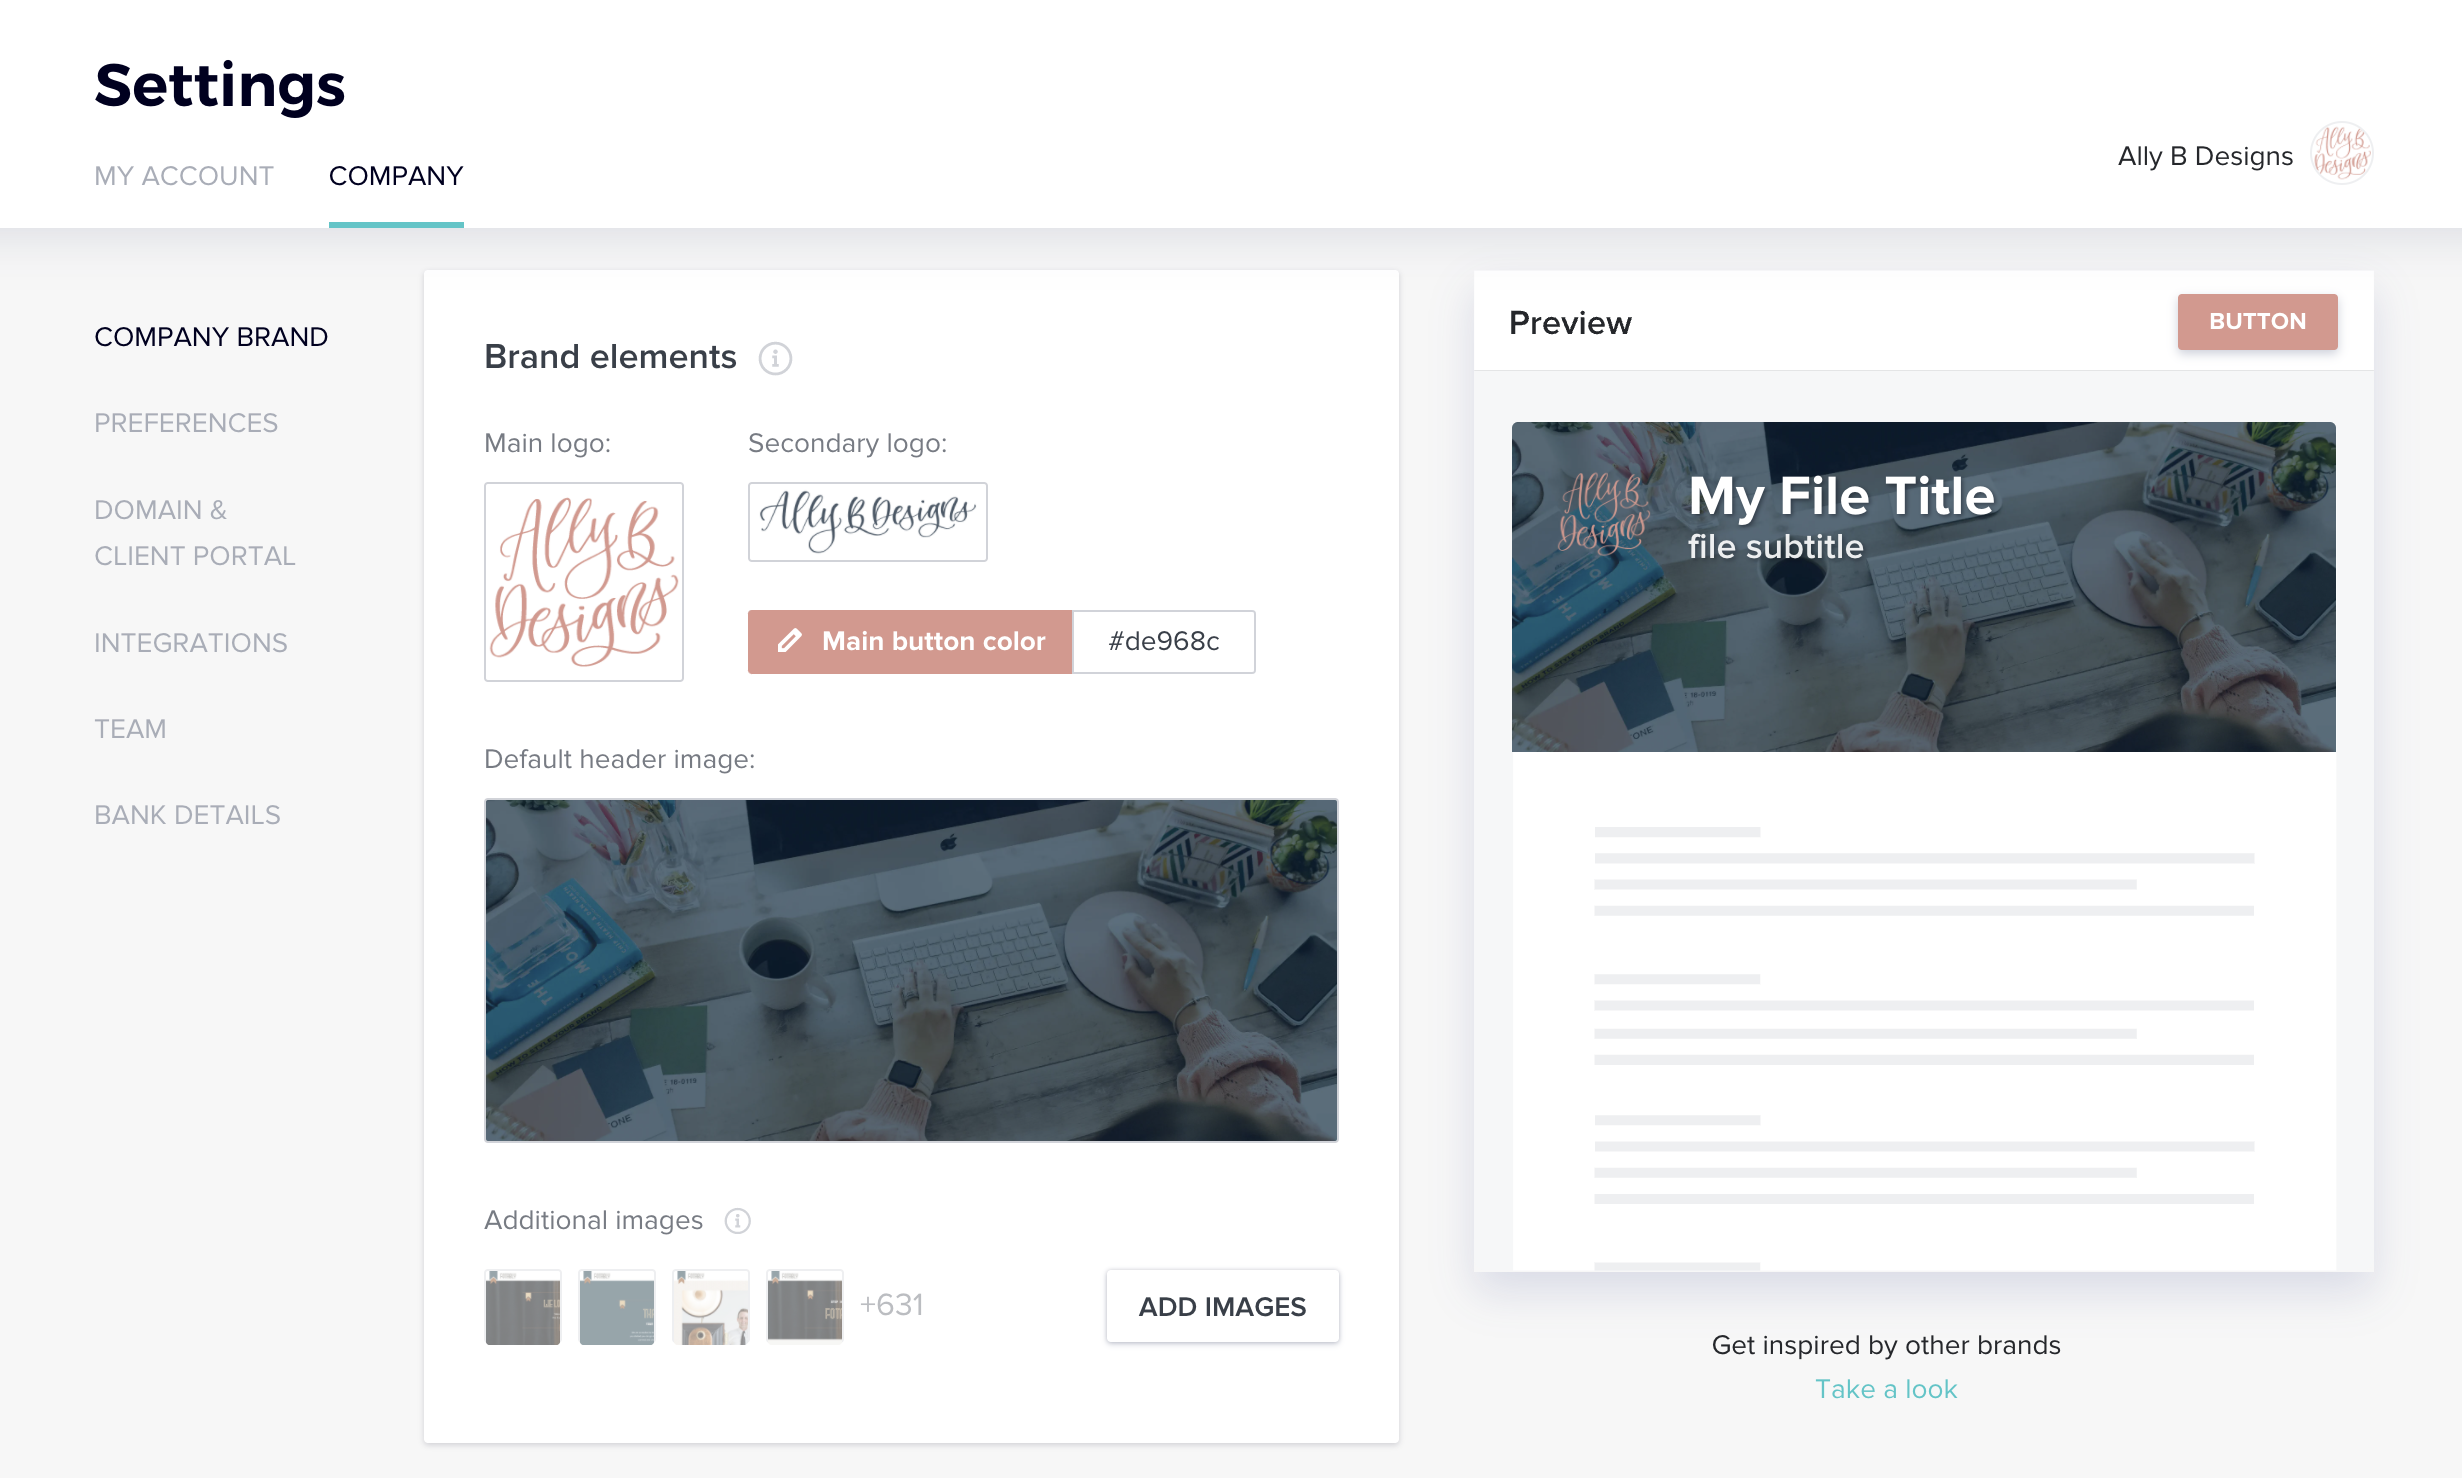
In HoneyBook, you can easily upload your brand assets like images, logos, fonts, and colors. This allows everything you do and send through the platform feels like a cohesive extension of you and your brand.
You can even link your business email account, so that your communications in and out of HoneyBook are one united front. In the first section (photo below) you will upload your logos, set your brand colors, and upload any on-brand imagery or headshots.

Next, you will be able to set a default theme including your colors and fonts for your client-facing smart files and other templates. This saves you time and automatically applies your brand settings to all brand collateral you start from scratch.
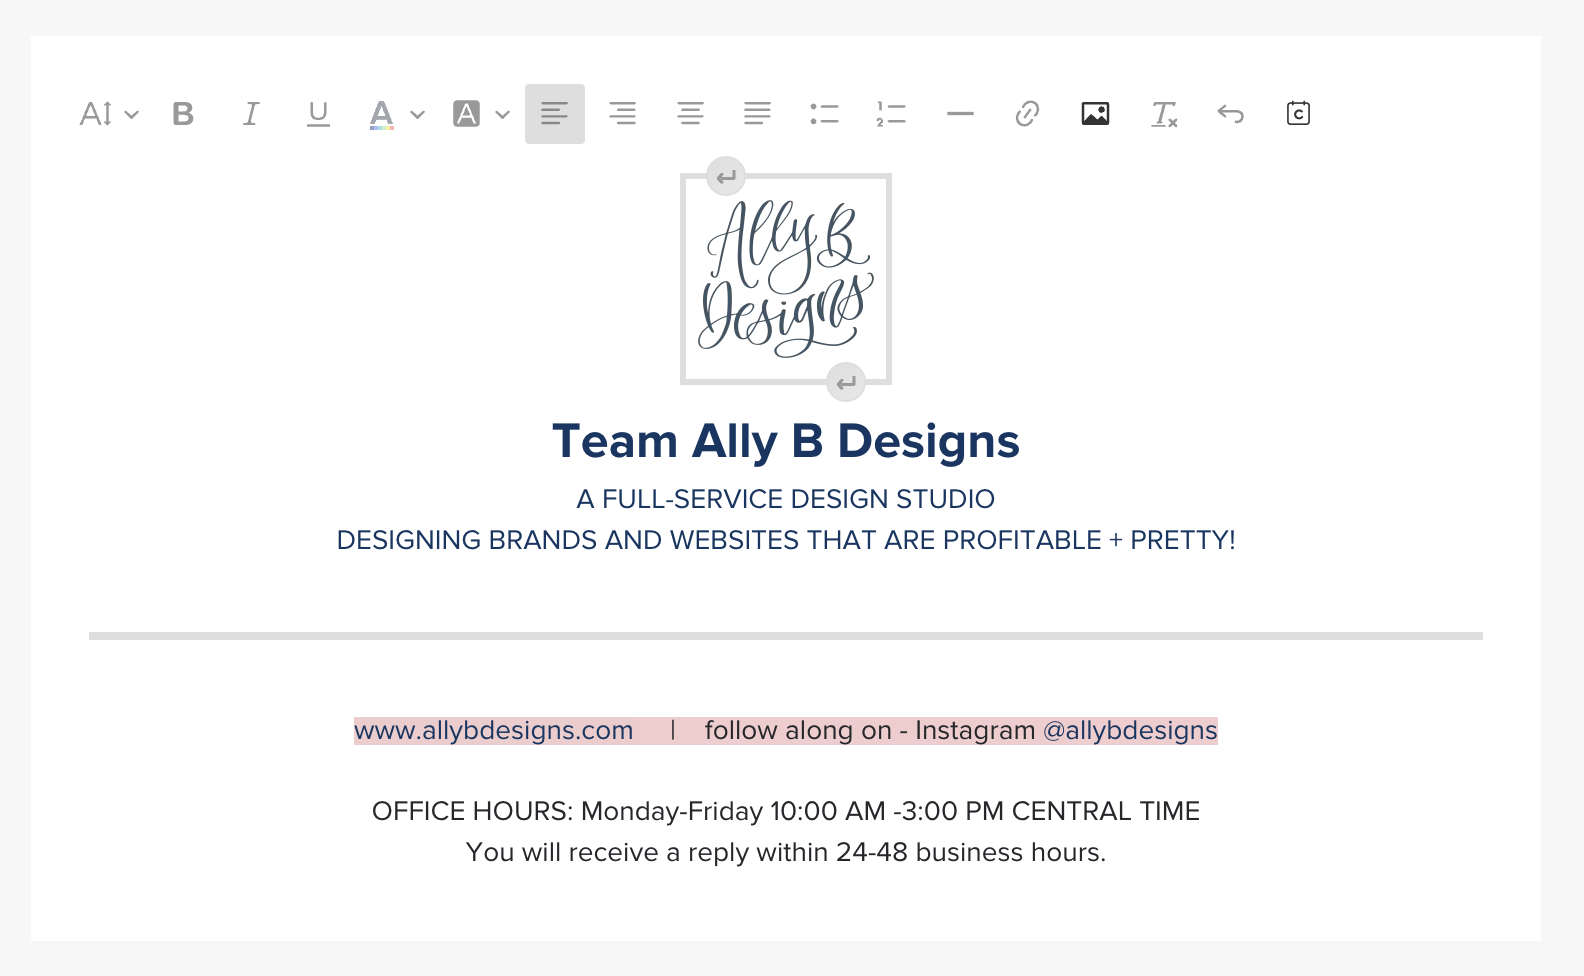
Finally, you are able to customize the email signature attached to all communication and email templates sent within your Honeybook account.
Personalize this by adding your logo, a headshot, social media accounts, website, and more. I like to include my office hours so my clients know when they can expect to hear from me and when I am out of the office.
Step 2. Customize Your Domain and Client Portal
Your client portal is a unique and secure space you can share with your clients. You can add your business name to customize the portal domain to make feel more on brand.
Once you create a “Project” for a client, you can invite them to your private client portal on Honeybook where you can communicate and share documents. This is where they can review any emails or documents that you’ve sent — it’s the perfect way for everyone to stay organized and up to date!
Click the “customize screen” and in the log-in screen preview section.

Select your background color from your brand’s color palette and whether you’d like to display your logo (in square or full size). Your logos will be available from your uploads in step one with your company brand section.
Click Save when you’re ready!
Step 3. Customize Your Templates
Templates allow you to save your commonly-used questionnaires or content and pull them into future projects with just a few easy clicks! They’re one of the best things that Honeybook has to offer and are seriously the biggest time saver! Plus, we know customization is key, which is why templates are easy to edit to fit your exact needs.
You have tons of different templates styles to choose from, such as non-booking Flows to gather and share details (questionnaires and services), booking Flows to collect signatures and get paid (contracts and invoices), plus emails, contact forms, and more.
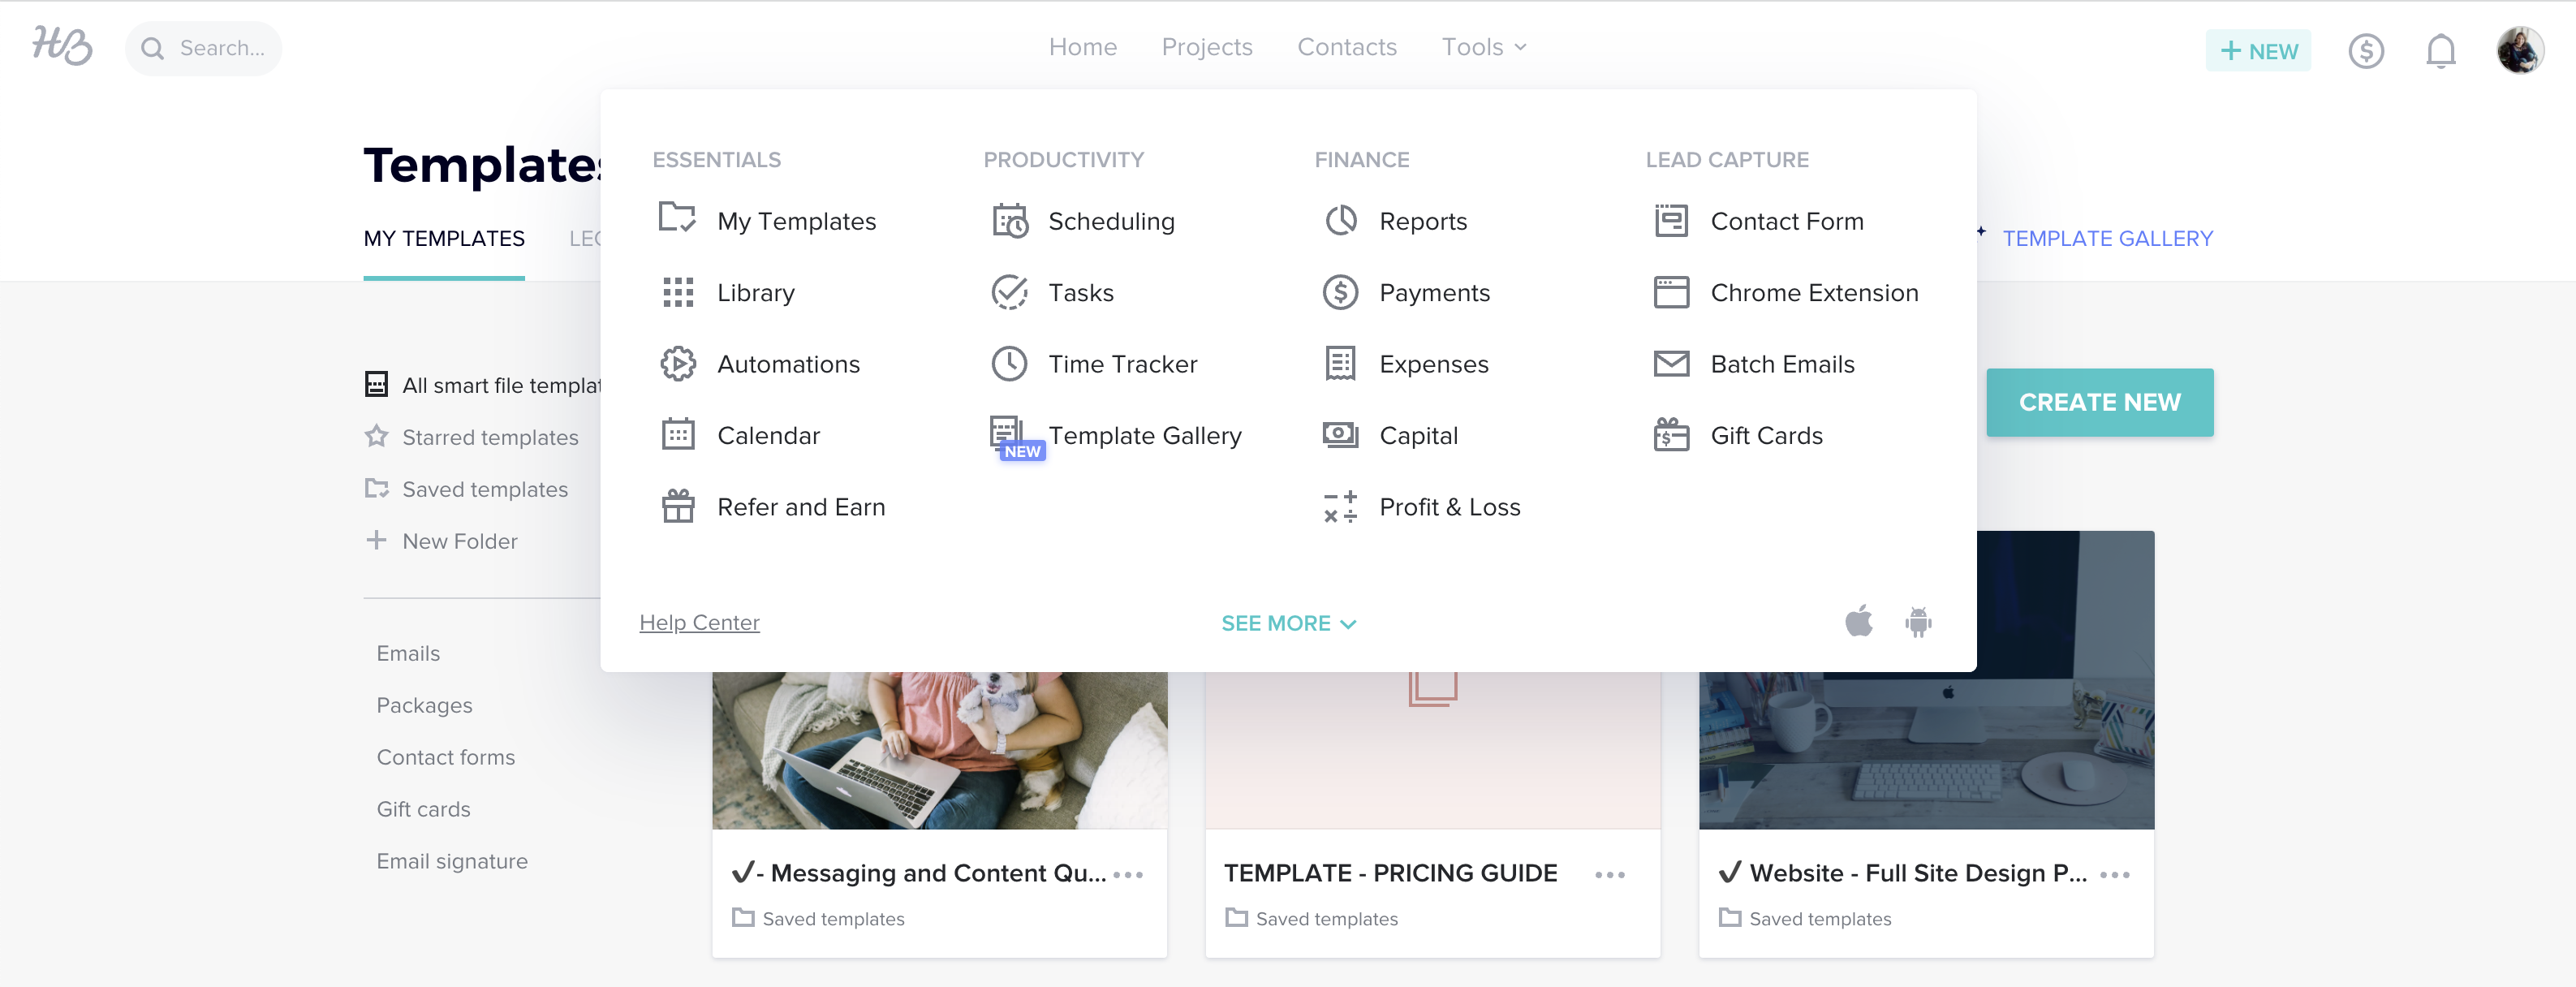
To access your templates, head up to the top of the page and click tools then find My Templates.
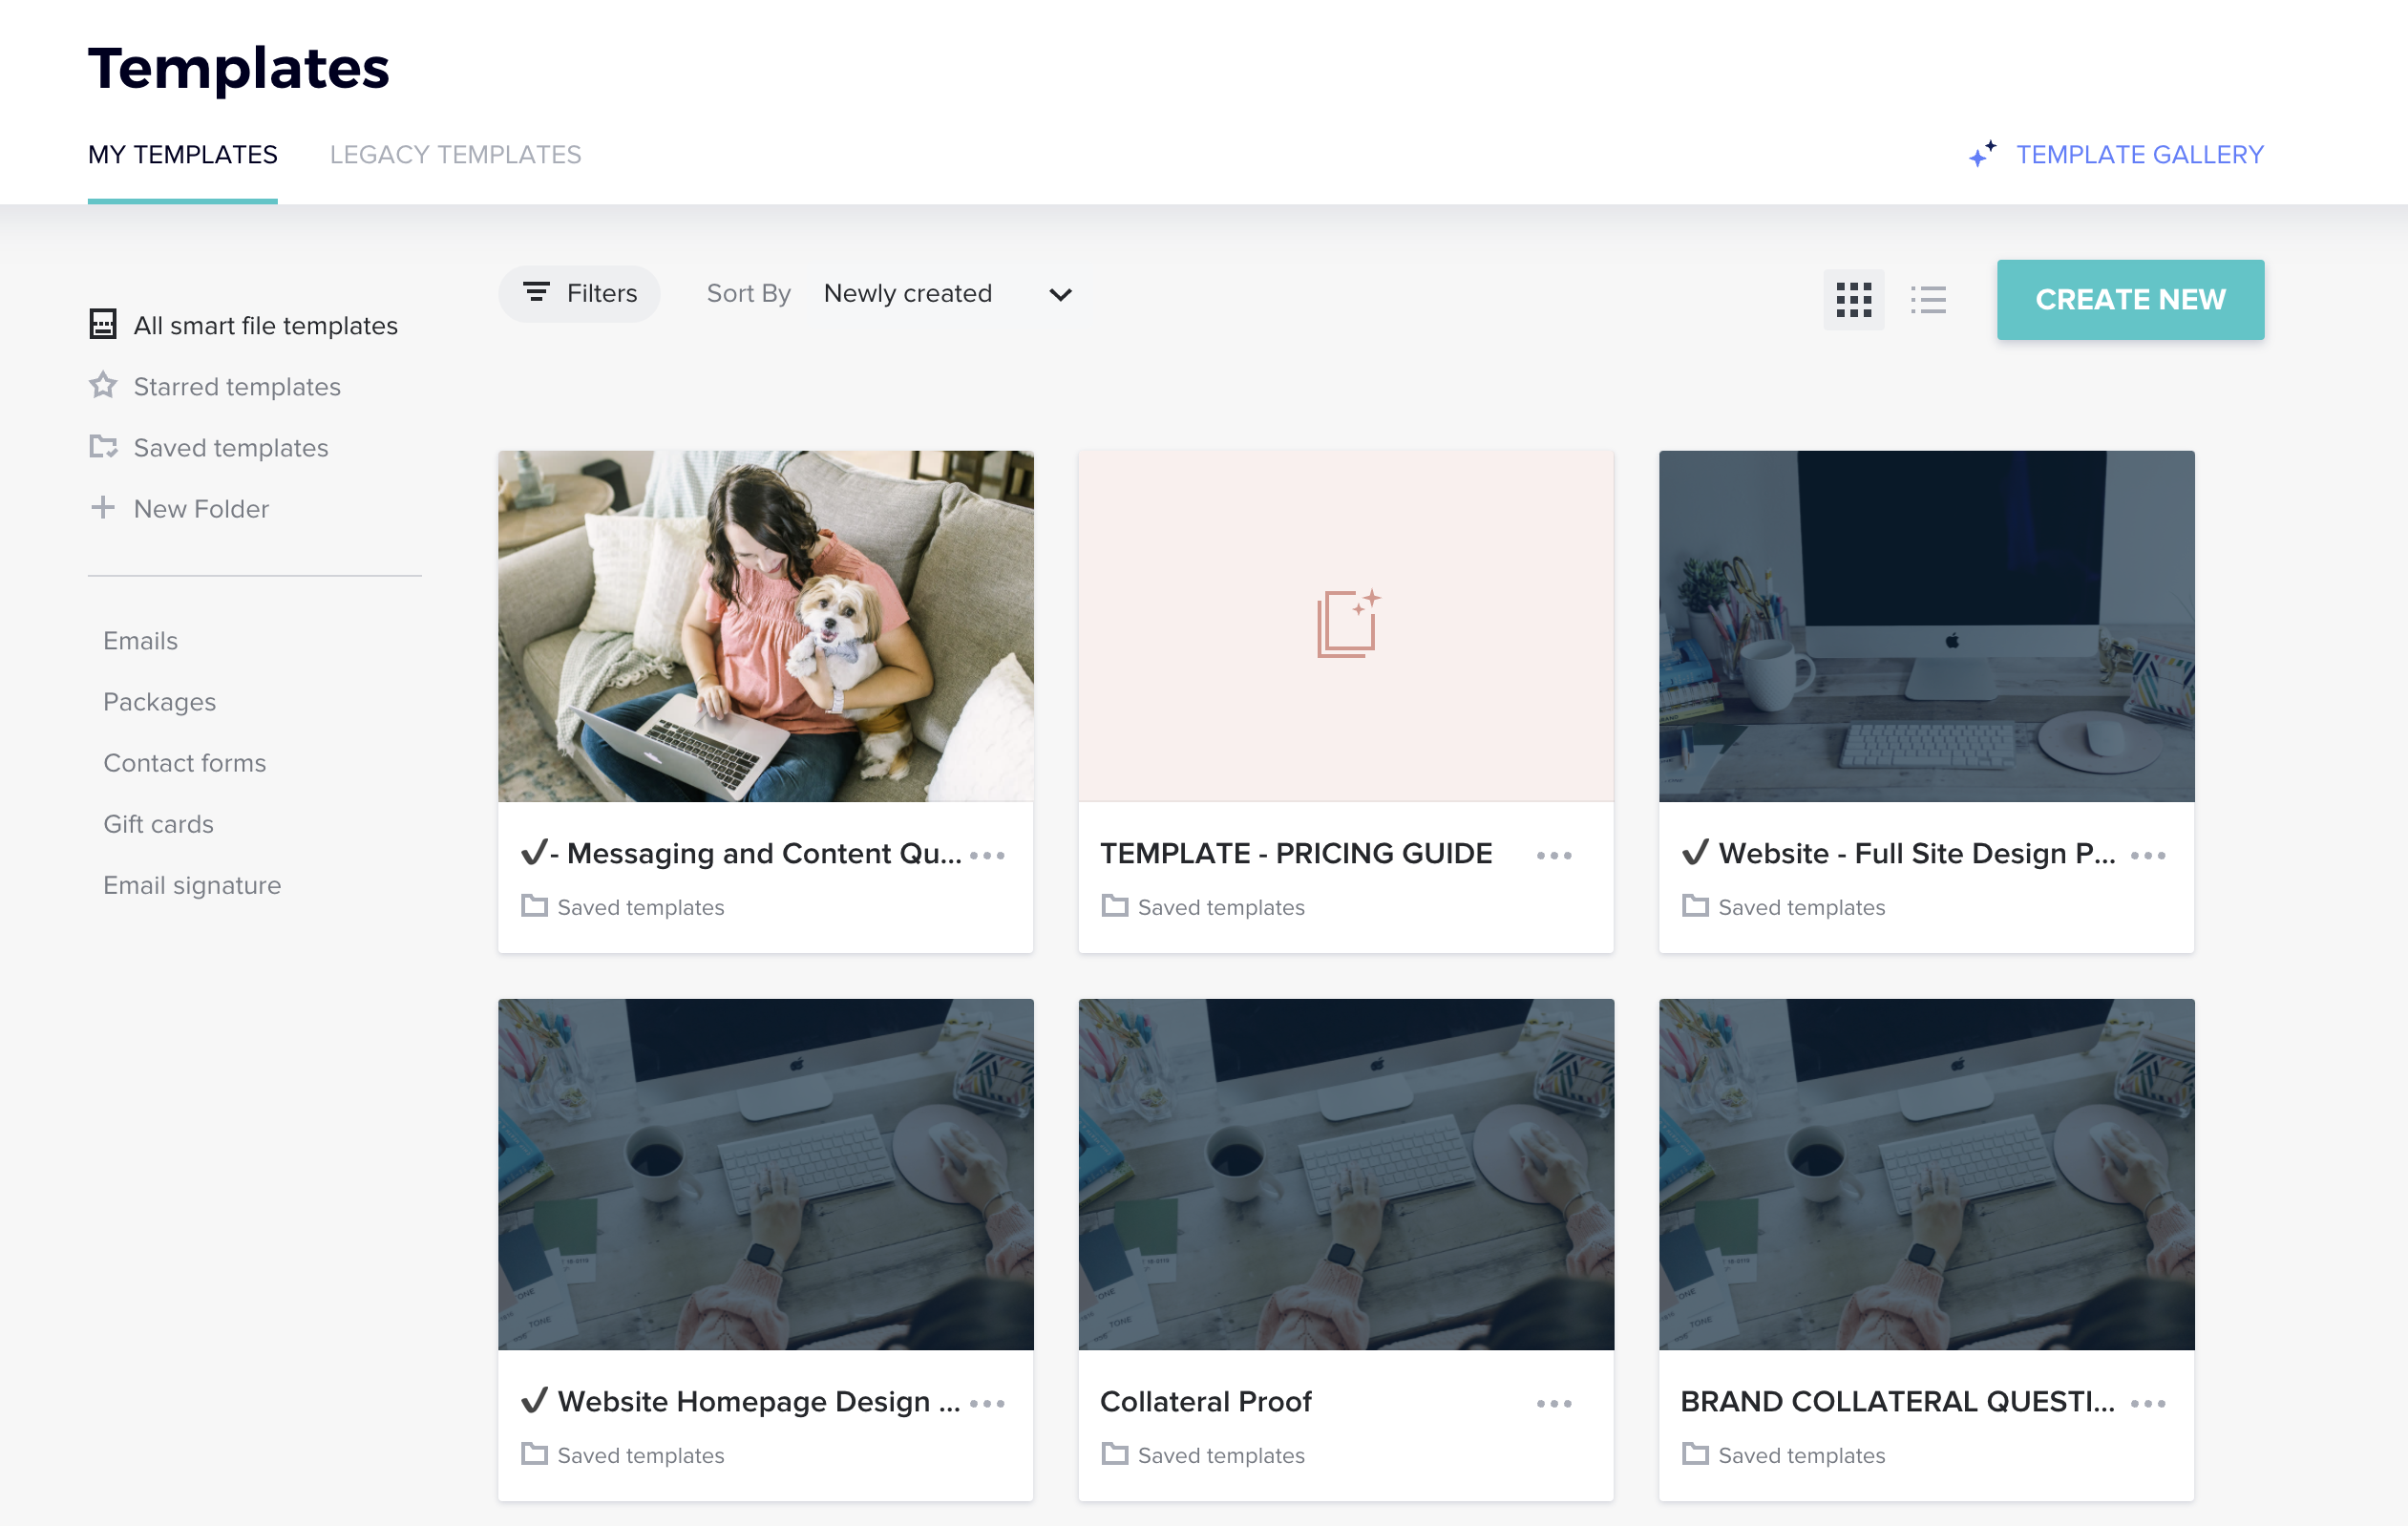
You’ll notice that we’ve already added in a number of sample templates to get you started — feel free to build off of these and customize to your liking. One of the best things that Honeybook has to offer is a complimentary account migration service, so take advantage of this time-saver if you want to get started even faster.
You can also check out the Flows Gallery for ideas or quick places to start! A lot of these have been designed by Honeybook Pros to give you a little jump start. Insert these in your own branding and be on your way! (You will even find a couple of designs from me!)
You can always start a template from scratch by clicking Create New.
Step 4. Create Your Contact Form
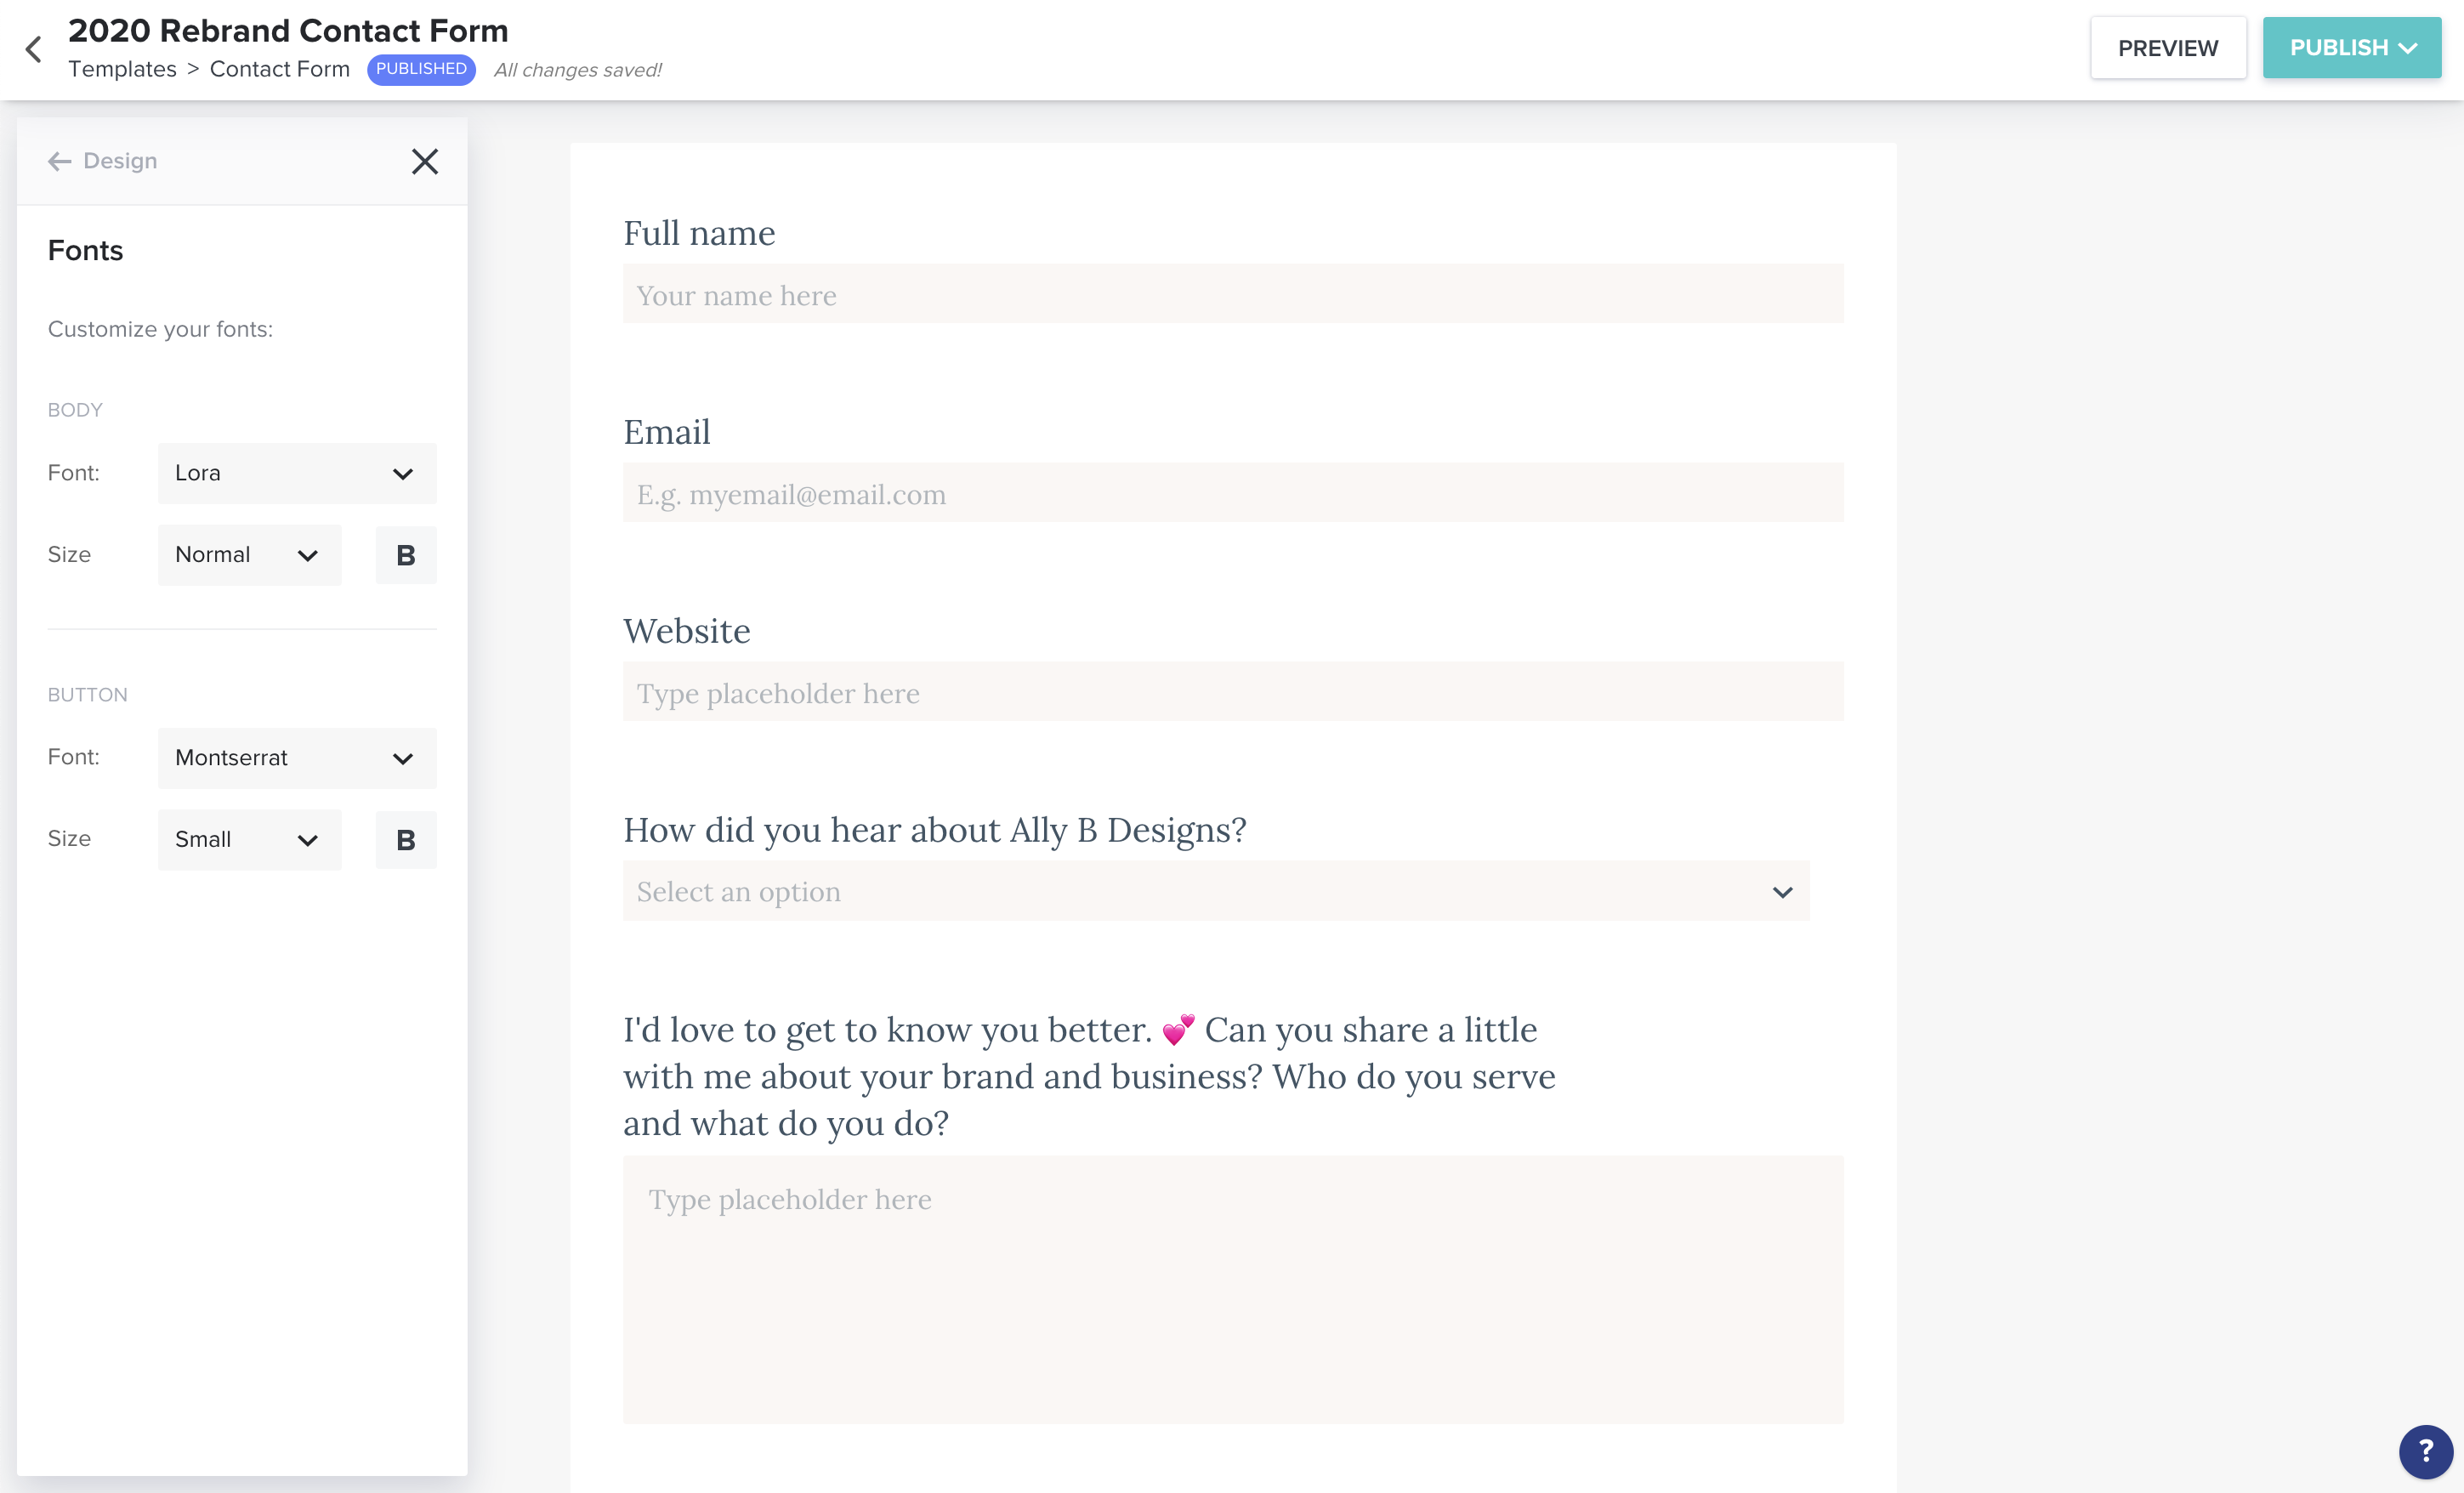
Using the Honeybook contact form widget is amazing for your brand!
You can customize the settings to match your brand beautifully so when you place it on your website or send the link it will be a cohesive experience!
The Contact Form allows you to gather information from potential clients — name, contact info, what they’re interested in booking you for, etc. — and funnel that info directly into your Honeybook account. Incoming requests will automatically populate as inquiries in your project pipeline.
Since all client communications in Honeybook need to be sent through Projects, these Contact Form submissions can save you a ton of time!
Instead of needing to go through the process of tracking down clients, manually collecting their information, creating a Project in Honeybook, entering the information you gathered, and THEN sending your first email or file… those first 4 steps can be taken care of before you even wake up in the morning.
You’ll have a Project ready to go, with all the information you need from your potential client. All you’ll need to do is reach out.
Plus it looks amazing on your website so you won’t even hesitate to embed it and get started collecting all of those inquiries!
Step 5. Set Up Your Honeybook Scheduling Tool
Alright, this might be more of a bonus step, but I can assure you from personal experience that adding a scheduling tool to my own website has increased my lead conversion and saves me SO much time!
Instead of an endless back-and-forth of “when are you free?” emails with clients, all you need to do is set your availability and share a link to your calendar. Then, clients can simply pick a meeting time that works for them from your real-time availability.
The scheduling tool easily links with your Google Calendar to make sure all of your availability is taken into account. So all you have to do is sit back and watch the meetings roll in. Since meetings allow you to truly showcase your brand (read: YOU!), you can easily book up to 40% more business when you have those meetings in place.
I have my scheduling link set up right on my service page so interested clients can book a call with me right then and there instead of waiting for a response.

I could probably go on and on and on about all of the things I love about Honeybook and how it has transformed my business.
I am proud to say that I am a Honeybook Educator AND a Honeybook Pro.
I will sing their praises until the end of time and I am the first to raise my hand to be a beta tester any and they are always working on a new development!
If you want to give it a whirl? Here’s a free 30 day trial for 30% off your Honeybook experience!


")


")