


A contact form is one of the most neglected parts of a website redo. Most of the time, they are just tossed up at the end to get the site launched. As long as it gets the job done, it’s good enough, right??
But aren’t Contact Forms way more important than “good enough?” We can send the very generic “Your form has been successfully submitted” message, OR we can make it an experience for our potential client that is truly one of a kind.
As we can all agree, time is something that just about everyone values, especially business owners. We’ve all heard that time is money, and it’s so true. I’ll show you how to use HoneyBook (my fave CRM) to step up your Contact Form and begin converting interested potential clients to all-in, ready-to-roll new clients!
When onboarding potential clients, there are typically several steps that need to be taken. But with these Contact Forms, you’ll pull all the usual steps (making a connection with the lead, manually collecting, setting up the Project in Honeybook, typing in everything you wrote down their information, and writing an email back to your new contact) into one automated process with the Contact Forms set-up I’ll show you. From there, all you need to do is reach out…sounds a lot less time-consuming, doesn’t it?
Imagine knowing your business is working for you, even when you’re taking a power nap, getting your nails done, or grocery shopping. You won’t need to worry any longer about racing to your computer to get back to your new lead while they’re still a hot lead. Instead, HoneyBook Contact Forms will act as your personal assistant, always ready to help you seize on the excitement of the person who just reached out to you!
It’s no secret that I love Honeybook and how it allows me to customize my form to match my brand. You can seamlessly integrate it into your website, creating a flawless experience that will elevate your brand and save you so much time! Let’s get started on how to get this done!
But first…
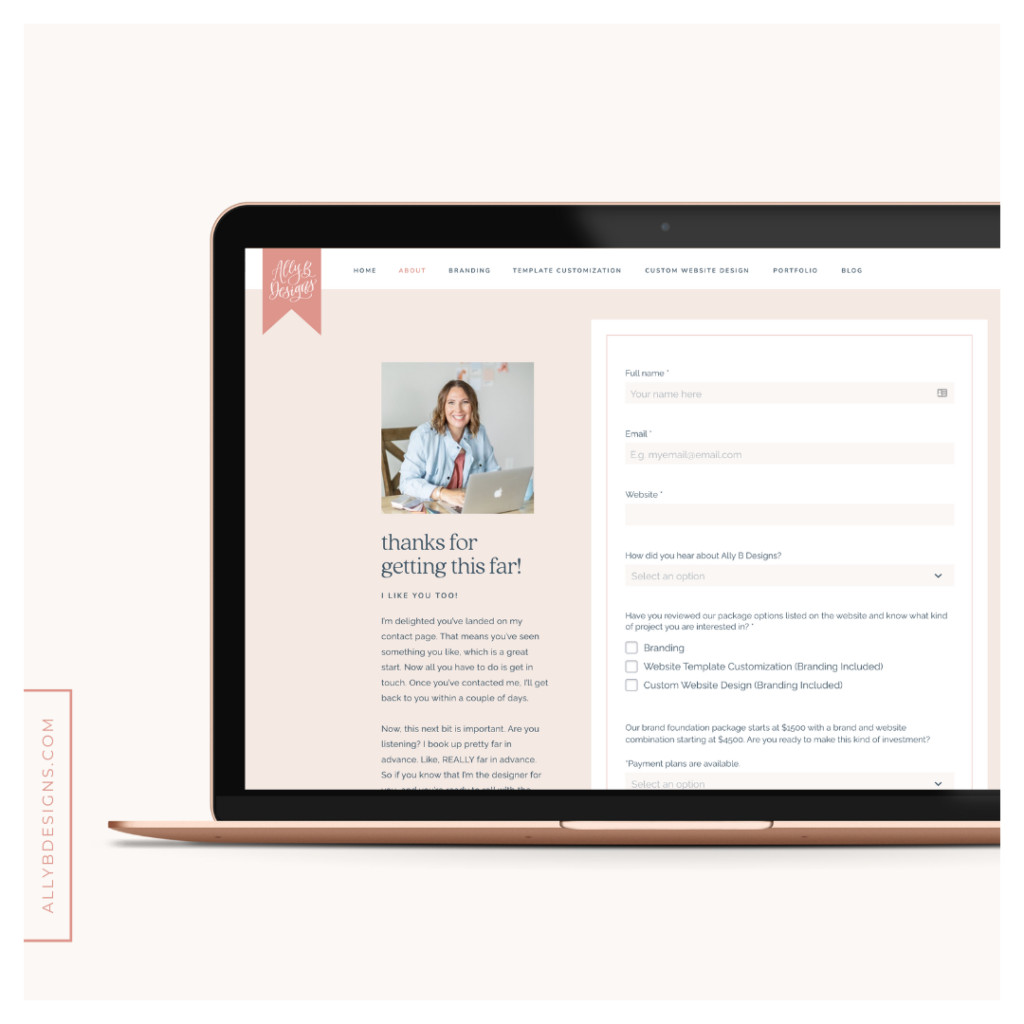
I want to share with you a quick overview of what your contact page should include before I get into the nitty-gritty details of your Contact Form.
- Make it look as good as the rest of your site! Images and attention to detail are essential when it comes to the design.
- Write a headline that lets visitors know they are in the right place.
- Give a friendly, personal introduction.
- Deliver a success message with some personality – NOT BORING!
- Give an email link as well as the Contact Form.
- Offer information about what will happen once they have contacted you (i.e., timeframe, next steps, etc.).
- Include your social links & signposts to your best content in the space below your Contact Form!
Ok, now let’s dig into the actual Contact Form! Since this form does the heavy lifting on the page, let’s make sure it’s perfect!
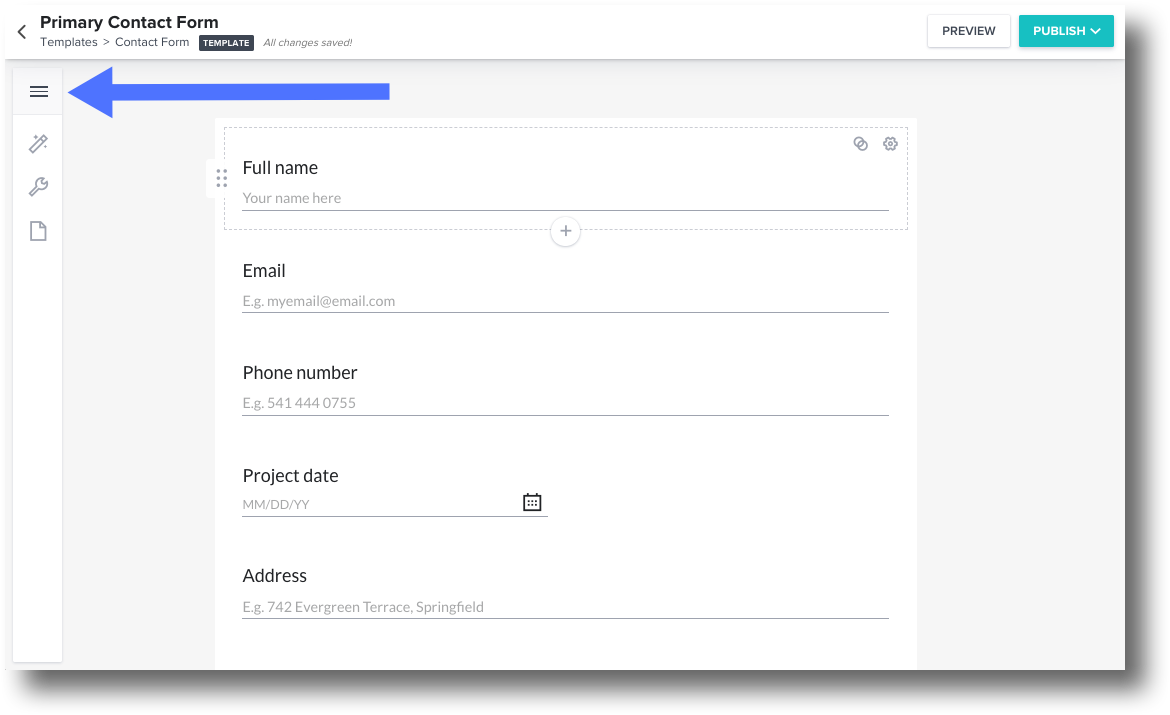
Step One: Create Your Contact Form
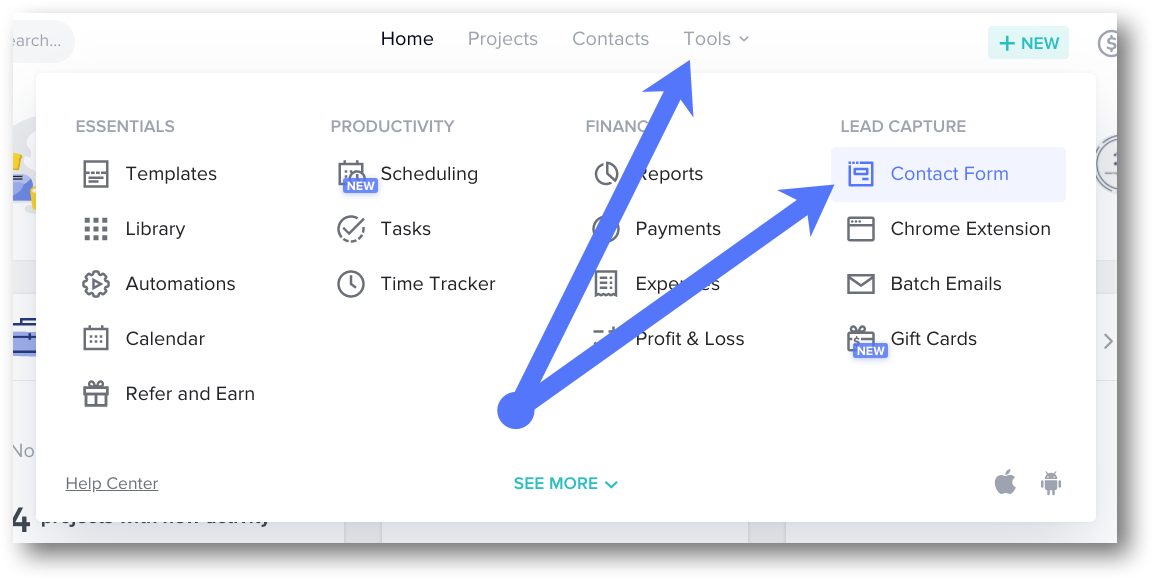
You can create your new Contact Form within your Honeybook account, clicking tools, and navigating to Contact Form under the lead capture heading.
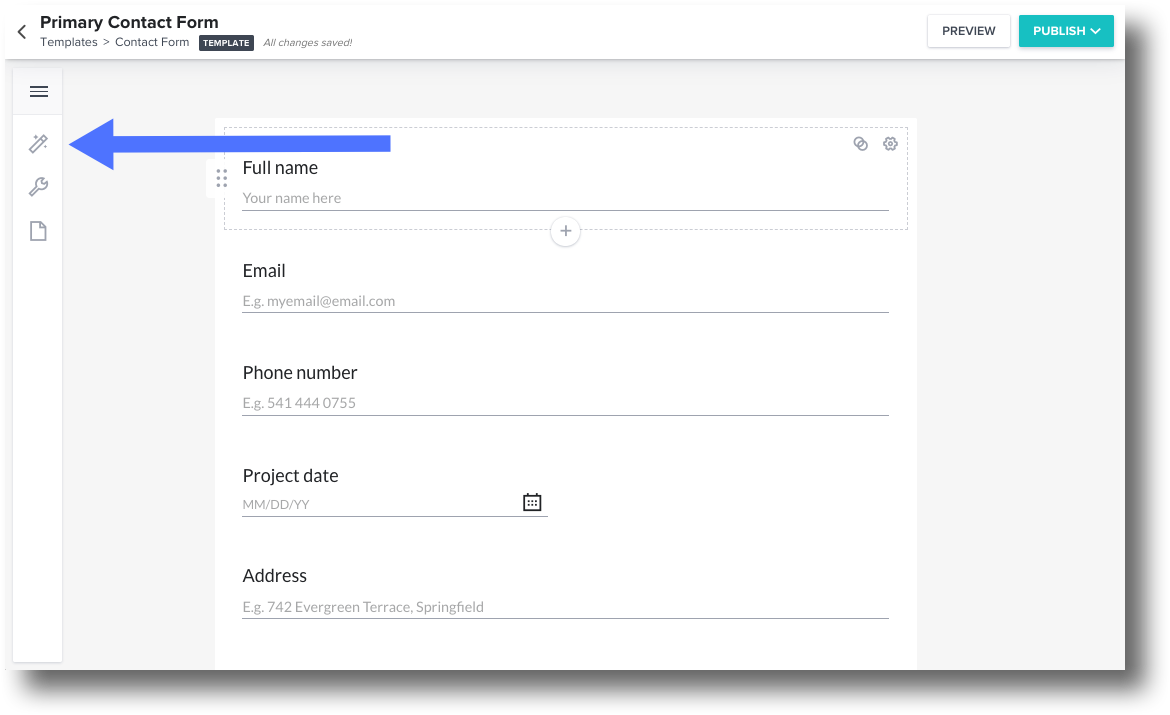
Work off the default form provided or create your own by clicking the Form icon in the sidebar, then select Add Contact Form.
Now, you can edit or remove any pre-populated questions by clicking on a question itself, selecting the text to edit, or clicking the trash can icon to delete.
Some questions will note that they connect to specific fields. When your leads fill these out, the answers will automatically populate into the Project Details fields of the Inquiry that gets created. You can determine which questions are connected to which fields by hovering over a question, then hovering over the Linked icon.
Step Two: Add Your Questions and Content
Let’s get right to the point – KEEP IT SIMPLE! People are busy and don’t want to spend extra time filling out a form with a million questions, especially when they are in the beginning stages of figuring out who they want to work with. In addition, they might not know all of the specifics around the project, so only include questions you absolutely need to know to start a conversation. We want to draw them in and not risk scaring them away with too much up required of them upfront.
Once you’ve clicked the Plus (+) button to add a Block, click the Questions tab within the Block selector.
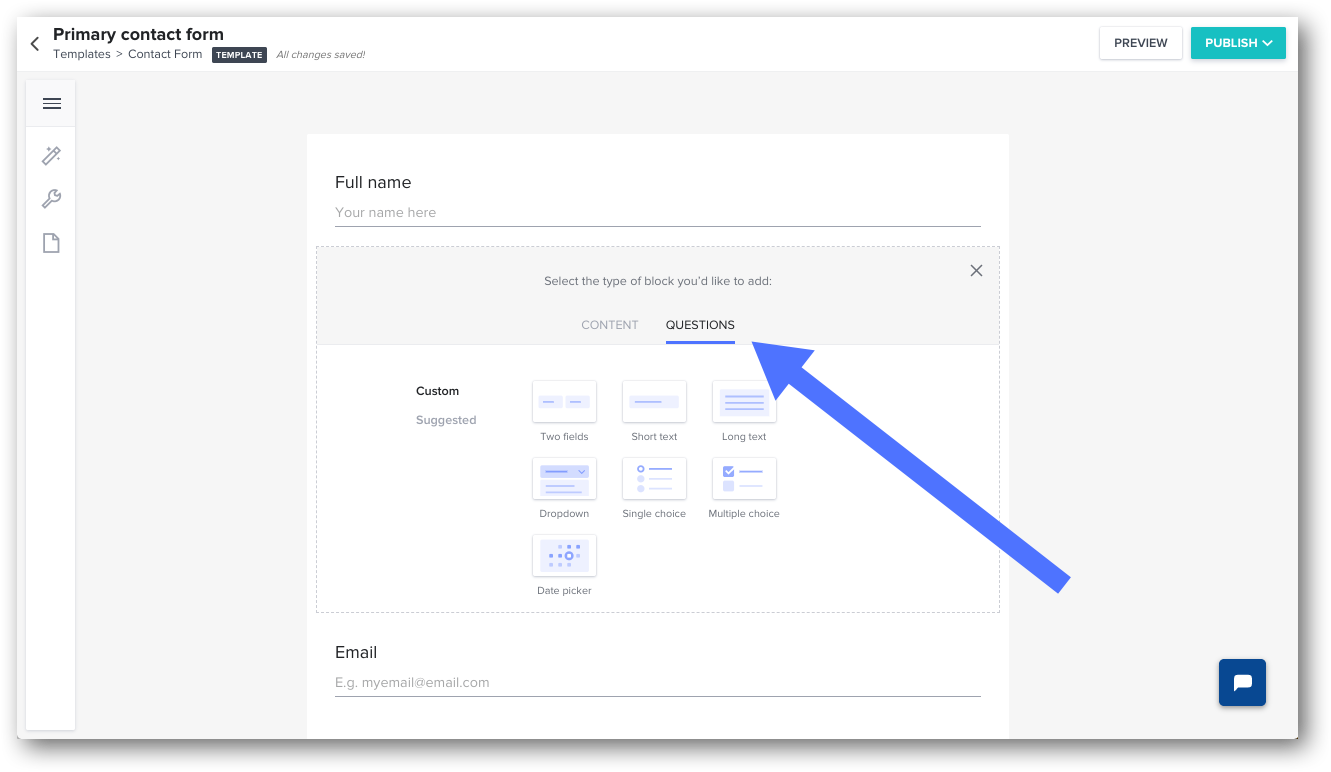
Select the question type. Remember, you can choose the Custom or Suggested tab for different question types. PLEASE NOTE: If you’ve selected the two fields question format, you can click the gear icon to choose the individual question formats for each field.
- Pro Tip: To ensure that every Inquiry has a Project Type associated with it, you can either set a Default Project Type in the Settings tab of your form OR add the Project Type question to allow leads to select their Project Type of choice. Either way, remember that you can update the answer options for Project Type (and Lead Source) questions under Company Settings > Preferences!
Enter the text of your question, and if necessary, the answer options (as in drop-down menu questions, multiple-choice questions, etc.)
- Pro Tip: Click the gear icon that appears when you hover over a question to toggle whether or not the question is required. Clients will not be able to submit their answers to the Contact Form if a required question is left unanswered.

To continue adding questions or other Blocks, hover over an existing question again and click the Plus (+) button that appears. Repeat as necessary!
- Pro Tip: Rearrange the order of questions by hovering over the content you’d like to move and using the 6-dot icon that appears to drag and drop the content into a different order.
Step Three: Customize Your Honeybook Contact Form
A consistent and cohesive brand is imperative to add value to your client experience. Honeybook is invaluable because it lets you customize your form to match your brand while making life easier and saving you time by automatically adding all the details to your account. Beautiful and efficient- we like that!
To customize fonts, text size, color, background colors, etc., click the Design icon in your sidebar to open your formatting options section.
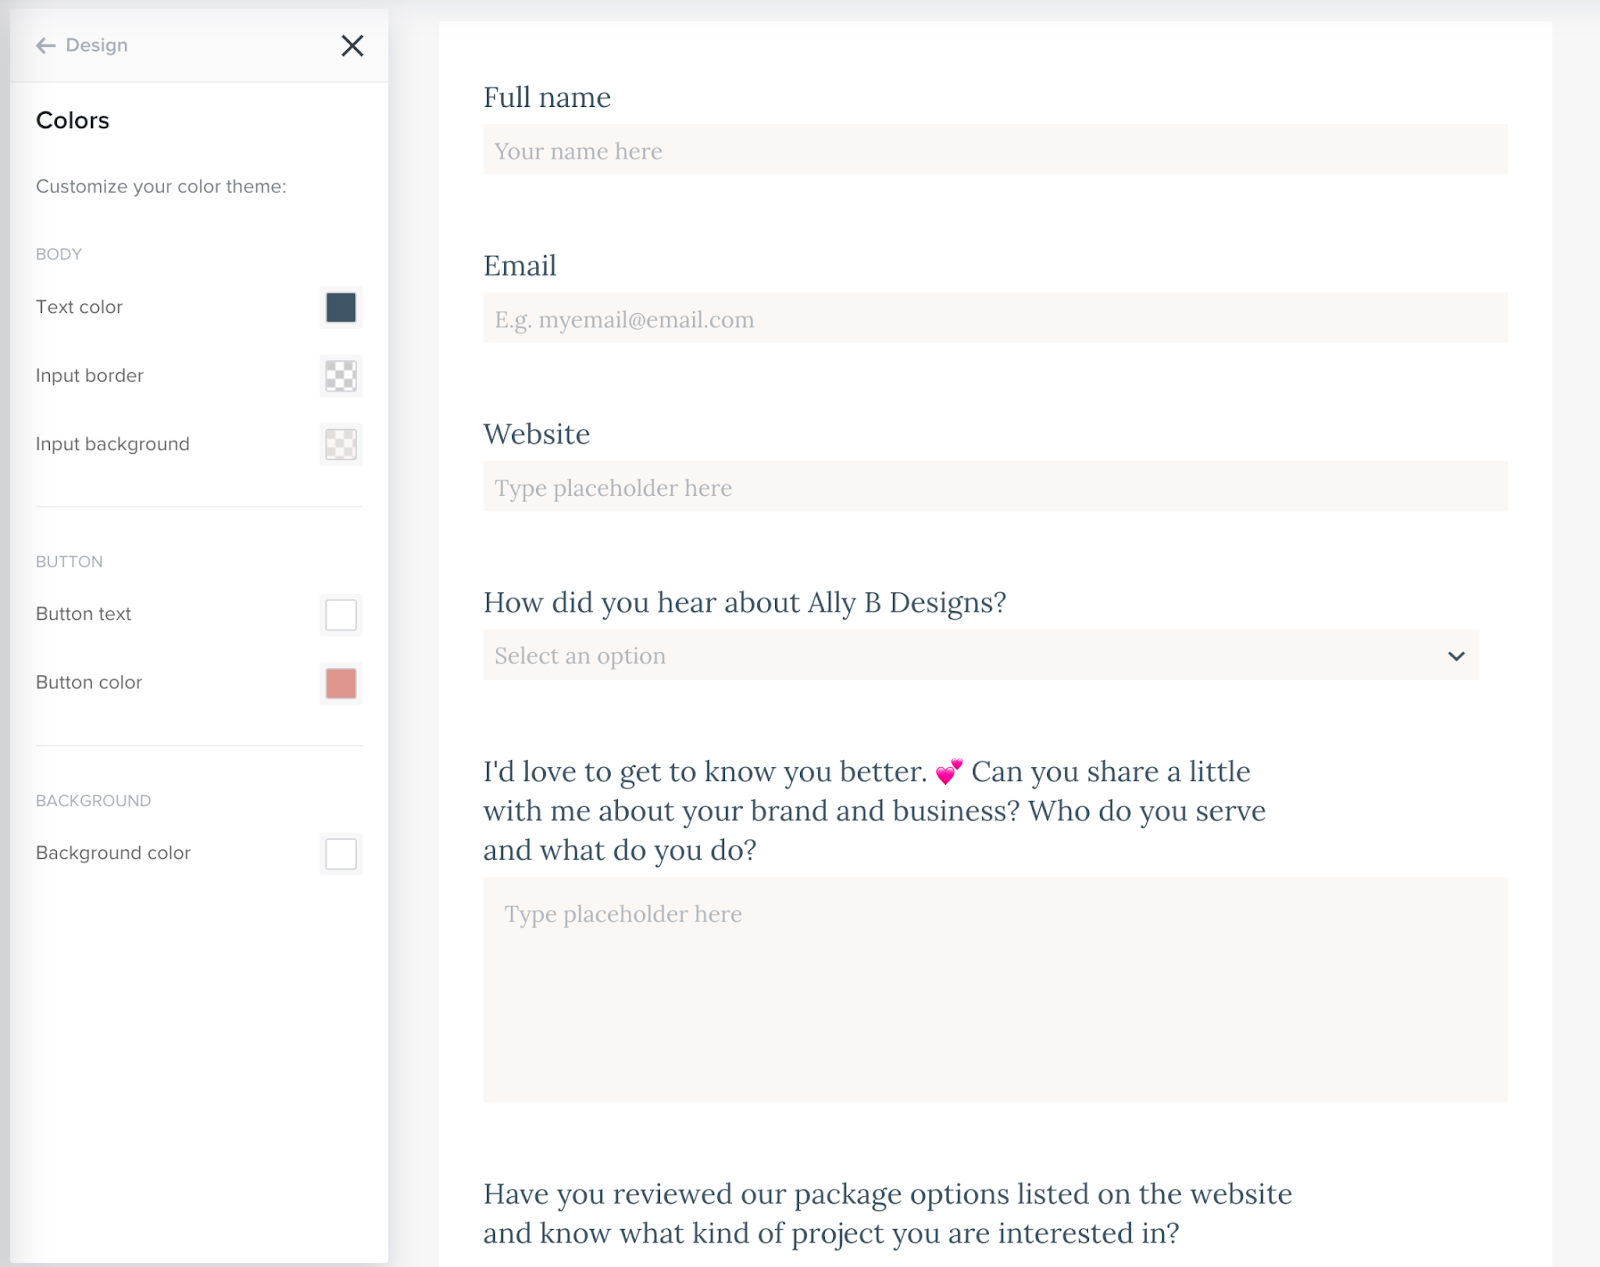
From the Colors section, you can customize your:
- Font color
- Questions’ input border color
- Questions’ input background color
- Send button’s text color
- Send button’s color
- Entire Form Background color
From the Font section, you can customize:
- Font style (for questions & send button)
- Text size (for questions & send button)
- Bold/not bold (for questions & send button)
Step Four: Selecting Your Form Settings
To customize things like Inquiry recipients, form redirects, and default Project Types, click the Settings icon in your sidebar to open your Settings section.
You can even select specific inquiry recipients. For example, from the Settings tab, you can choose which team members should be notified of incoming Inquiries and which team members should automatically be added to the already created Projects.
Step Five: Beyond the Contact Form
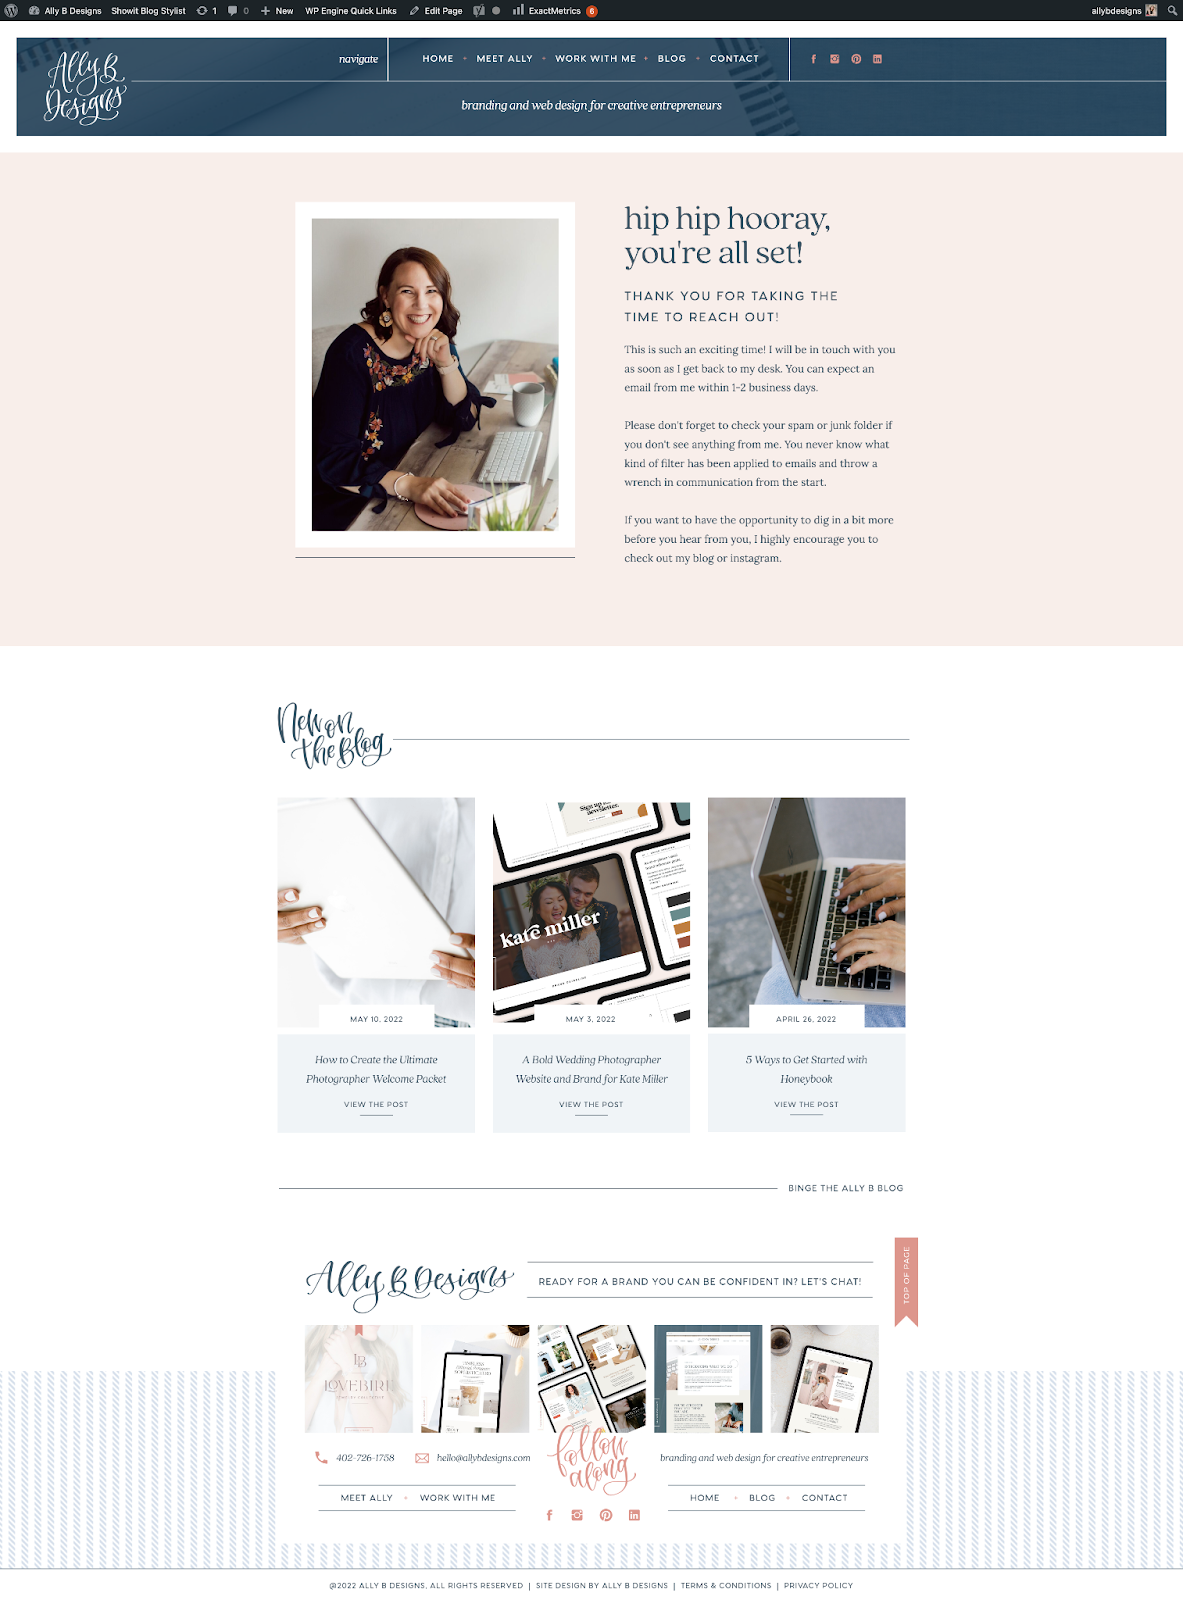
The final form setting you want to select is the Form Redirect Location. You can choose where your clients should be redirected from the Settings tab once they’ve submitted their Contact Form. Under the After Form Completion Redirect To tab, choose whether you’d like leads to see a default thank you message upon form submission, or input a custom URL to which you’d like to redirect them.
I said it before, but if you want to just display a success message, please be sure to personalize it! Let your potential clients get to know you immediately by adding a message that gives them a sneak peek of what it would be like to talk to you in person.
Let’s say your visitors like what they see and are ready to get in touch. So they complete your Contact Form, press Submit…drumroll….
“Your form has been successfully submitted.”
Pressing send is the most exciting moment for them before actually hearing from you, and what do you give them??
The standard Contact Form success message? Snooze!!
This is your golden opportunity not to do what everyone else does – to stand out from the crowd!
You could be at the start of a beautiful relationship.
It’s time to level up.
I’m talking about setting up a Contact Success Page.
First, don’t leave new connections hanging. Instead, redirect them to a ‘contact success page’ and get creative. How about throwing a little informal video in there?
And I mean informal – a standard webcam and a 30-second welcome are enough to begin building the relationship between your prospective client and the real you. You’re going to meet them eventually, so now is the time to start to reveal a more approachable version of yourself.
A video will also help your clients feel more at home booking a virtual or Skype call with you, reducing face-to-face consultations.
Be warm and genuine, or share something fun. Heck, grab a pet! Most importantly, don’t overthink it or get too technical. Be genuine. People are drawn to real people, so get it done and get it on your success message.
Why not add some uber-useful blog posts that help establish you as an expert? Ex. If you’re a wedding photographer, show them some posts about…wedding photos, of course!
Remember, you’re the expert.
You’ve probably been to more weddings in a year than most people attend in their entire lifetime.
And don’t forget to direct them to your social media. If you love Insta, chances are they love Insta – it’s the perfect place to tempt them with your Instagram feed.
Embedding or distributing your Contact Form
There are a few ways to distribute your Contact Form. One way is to embed the form directly onto your website, ensuring that inquiries coming in through your site funnel right into HoneyBook. Copy a link to the form, which you can then distribute with no embedding necessary or do both!
To embed your form on a website:
1. Make sure it all looks good first! Click the Preview button, so you know what you’re embedding.
2. When you’re ready, click Publish.
3. Click Copy Code to copy the code snippet to your clipboard — you’ll paste this code later when you’re embedding it into your website!
4. Now, you can embed the code right into your website. Here’s how to do that for a variety of sites.
- HoneyBook Tip: Don’t see your website listed in that article? Get in touch with our Concierge team by clicking the Question Mark icon on any HoneyBook page — they’d be happy to help determine steps for your site!
To generate a link to your form:
1. Make sure it all looks good first! Click the Preview button, so you know what you’re sharing.
2. When you’re ready, click Publish.
3. Click the Menu icon to slide open your sidebar.
4. Under the Get a Direct Link header, click the Copy icon to copy the link to your clipboard or the Open Link icon to pop open a new tab containing your form. Simple, right?
HoneyBook Tip: Copying your Direct Link makes it simple to share your form on your social channels or send it right to your clients. You can do this in addition to — or instead of — embedding the code on your website. Whatever suits your business! You can find more ideas on distributing your Direct Link here.
Now, any leads coming in from your form will automatically create new Projects in the Inquiry stage of your HoneyBook Project Pipeline! You can even automate responses to incoming Inquiries — sending emails, Brochures, and more — using Automations!
Pro tip: if you want to embed your contact form on your ShowIt website, you can follow the instructions in this blog post.
I could probably go on all day about all of the things I love about Honeybook and how it has transformed my business.
I am proud to say that I am a Honeybook Educator AND a Honeybook Pro.
I will sing their praises until the end of time, and I am the first to raise my hand to be a beta tester any time, as they are constantly working on a new development!
Is Honeybook the Answer to Your Web Design Business Needs?
Snag it for up to 30% off your first year at checkout!
If you have any questions at all and want to chat with me directly, I would love for you to reach out! Contact me by sending a message on my very own Honeybook Contact Form!


")


")